Introduction
One will discover how to estimate the monthly energy production of a 300W balcony solar panel expressed in kilowatt‑hours. The guide explains the scientific basis, the data required, and the calculations that translate sunlight into usable electricity. It also highlights the factors that cause deviation between theoretical and actual output, such as shading, temperature, and system losses. By the end of the article, one will be able to plan battery capacity, select compatible power stations, and optimise panel placement for maximum return on investment.
What You’ll Need
- A 300W solar panel suitable for balcony mounting (examples include Mndstek 300W Bifacial Solar Panel).
- A PWM or MPPT charge controller compatible with 12V or 24V systems.
- Measuring tools such as a multimeter or a solar power meter.
- Access to solar irradiance data for the installation location (online databases or mobile apps).
- Basic mounting hardware, such as brackets, screws, and a level.
These items constitute the minimal toolkit required to perform accurate calculations and to validate the results on‑site. The recommended panel provides high conversion efficiency and bifacial technology, which improves output on reflective balcony surfaces.
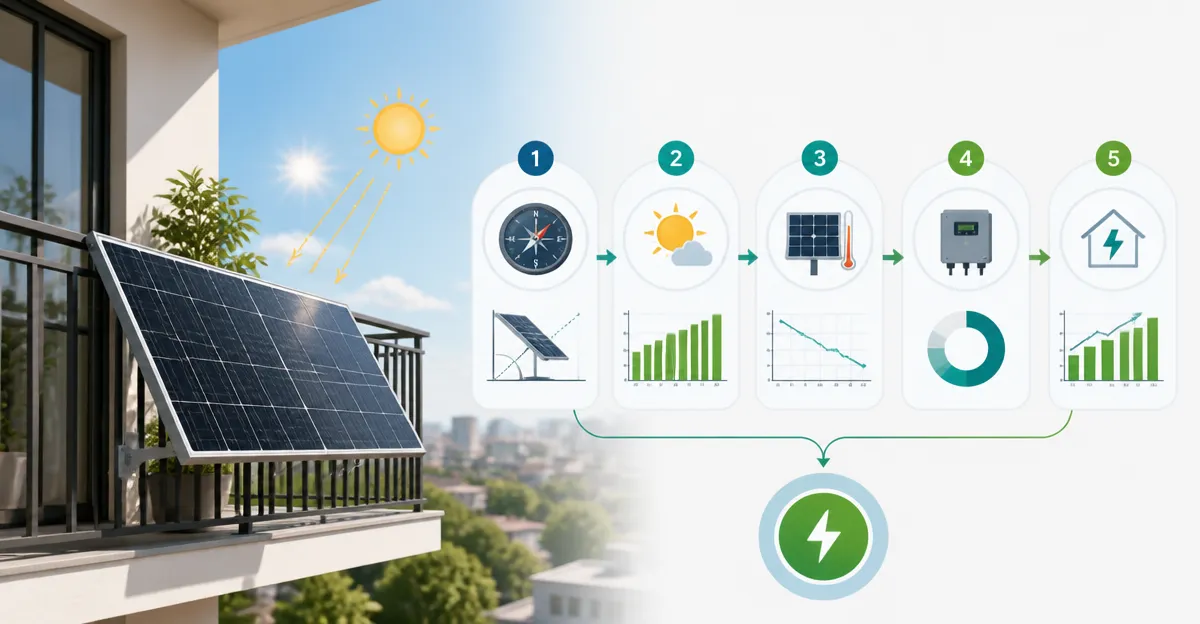
Step 1: Determine Panel Orientation and Tilt
The first practical step is to orient the panel toward true south (or north in the southern hemisphere) and to set an optimal tilt angle. A tilt equal to the latitude of the installation site generally maximises annual energy capture, while a slightly lower angle may be preferable for winter performance. One should use a digital inclinometer to verify the angle, and secure the panel with brackets that resist wind uplift. The Mndstek 300W Bifacial Solar Panel is lightweight (21.2 lb) and includes pre‑drilled mounting holes, making the alignment process straightforward and reducing installation time.
Key specifications of the panel include a 25.3 % conversion efficiency, IP68 weatherproof rating, and a bifacial power boost that can increase output by up to 30 % on reflective surfaces. These features are valuable on balconies where the floor may reflect sunlight onto the rear side of the panel. The panel’s price of $169.99 and a perfect 5‑star rating indicate strong value for a high‑efficiency product.
Step 2: Gather Solar Irradiance Data for Your Location
Accurate estimation requires the average daily solar irradiance (peak sun hours) for the specific geographic coordinates. One can obtain this information from reputable sources such as the National Renewable Energy Laboratory (NREL) or from smartphone applications that provide monthly averages. For a typical temperate city, the peak sun hours range from 3.5 h in winter to 5.5 h in summer. It is essential to record the values for each month, because the final kWh calculation is the sum of the monthly contributions.
When the balcony is surrounded by tall buildings, one should adjust the irradiance downward to reflect shading losses. A simple method is to observe the panel for a clear day and note the fraction of the sky that remains unobstructed. This observed shading factor will be incorporated in the loss adjustment later in the guide.
Step 3: Calculate Theoretical Daily Energy Output
The theoretical daily energy (in watt‑hours) is obtained by multiplying the panel’s rated power by the peak sun hours and by the panel efficiency. The formula is: Daily Wh = 300 W × Peak Sun Hours × 0.953 (where 0.953 accounts for the 25.3 % efficiency relative to the standard test condition of 100 %). For example, with 4.5 peak sun hours, the calculation yields 300 × 4.5 × 0.953 ≈ 1,287 Wh, or 1.29 kWh per day.
One should repeat this calculation for each month using the corresponding peak sun hour value. The resulting daily figures are then multiplied by the number of days in the month to obtain the monthly theoretical production in kilowatt‑hours.
Step 4: Adjust for Real‑World Losses
Real‑world output is always lower than the theoretical value because of several loss mechanisms. Typical losses include temperature derating (approximately 0.5 % per °C above 25 °C), wiring resistance (1‑2 %), inverter or charge controller inefficiency (5‑10 %), and shading (variable). A conservative overall loss factor of 20 % is often applied for balcony installations.
To measure actual losses, one can use a portable solar kit such as the DOKIO 300W Foldable Solar Kit. This kit includes a PWM controller, dual USB ports, and a 9.85 ft cable, allowing one to connect the panel to a multimeter and record voltage and current under real conditions. The kit is priced at $179.77 and holds a 4.1‑star rating from over 3,800 reviewers, indicating reliable performance for field testing.
Applying a 20 % loss factor to the theoretical daily energy yields an adjusted daily output of 1.29 kWh × 0.80 ≈ 1.03 kWh for the example month. Multiplying by the days in the month provides the expected monthly production.
Step 5: Convert Daily Energy to Monthly kWh
After adjusting for losses, the monthly kilowatt‑hour value is calculated by the following steps: (1) Multiply the adjusted daily kWh by the number of days in the month, (2) Sum the results for all twelve months, and (3) Round to two decimal places for reporting. For instance, a month with 30 days and an adjusted daily output of 1.03 kWh results in 30 × 1.03 = 30.9 kWh.
These monthly figures can be compared against the energy consumption of typical balcony appliances, such as LED lighting (10 W), a small refrigerator (80 W), or a laptop (50 W). By matching consumption with production, one can size a battery bank that stores excess energy for nighttime use.
Step 6: Validate With a Monitoring Device
Validation of the calculated values is best performed with a dedicated solar monitor or a power station that logs input energy. The Renogy 300W Portable Solar Panel includes an MPPT‑compatible connector and can be paired with Renogy’s Bluetooth monitoring module (sold separately). This combination provides real‑time data on voltage, current, and cumulative kilowatt‑hours, enabling one to verify the accuracy of the spreadsheet calculations.
Renogy’s panel costs $386.98, carries a 4.5‑star rating from 59 reviewers, and offers N‑type cells with 25 % efficiency, making it an excellent benchmark for performance comparison. By logging at least one full week of data, one can refine the loss factor used in Step 4 and improve future estimates.
Tips & Pro Tips
- Mount the panel on a sturdy, non‑conductive bracket to avoid galvanic corrosion on metal balconies.
- Use MC4‑compatible connectors whenever possible; they provide weather‑tight sealing and simplify series or parallel wiring.
- Consider adding a reflective surface (white paint or aluminum foil) behind the panel to maximise bifacial gain.
- Periodically clean the glass surface with a soft brush and mild detergent to maintain the 25 % efficiency rating.
- When the balcony receives less than 3 peak sun hours on average, supplement the system with a small wind turbine or grid‑tied backup.
Troubleshooting
If the measured output is significantly lower than the calculated value, first inspect the panel for shading caused by new foliage or temporary structures. Next, verify that all connections are tight and that the charge controller is set to the correct battery type (12 V, 24 V, etc.). Finally, check the temperature coefficient; panels operating above 45 °C may suffer a 15‑20 % efficiency drop, requiring a repositioning to improve airflow.
Conclusion
This guide has demonstrated how to estimate the monthly kWh production of a 300W balcony solar panel by gathering irradiance data, applying efficiency and loss factors, and validating the results with real‑world measurements. By following the six steps, one can confidently size storage, select compatible power stations, and optimise panel placement for reliable renewable energy on a balcony. The recommended products provide practical tools that streamline each phase of the process while offering high quality and strong user satisfaction.
Products Mentioned in This Guide
Frequently Asked Questions
How do I calculate the monthly kWh output of a 300W balcony solar panel?
Multiply the panel's 300W rating by the average daily solar irradiance (kWh/m²) for your location, then by 30 days, adjusting for system efficiency (typically 75‑80%).
What data do I need to estimate the panel’s production?
You need the local average daily solar irradiance (or peak sun hours), the panel’s wattage, and an estimated system efficiency factor.
How do shading and temperature affect the panel’s real‑world output?
Shading reduces the effective irradiance, while high temperatures lower panel efficiency, both causing actual production to fall below theoretical values.
What size battery should I pair with a 300W panel for nightly use?
Estimate daily generation (e.g., 300W × 4 peak‑sun‑hours ≈ 1.2 kWh) and select a battery with at least that capacity, adding a safety margin of 20‑30%.
Is an MPPT charge controller better than PWM for a balcony setup?
Yes; MPPT controllers harvest more power from varying voltage conditions, typically boosting efficiency by 10‑30% compared to PWM.